What you need before you start
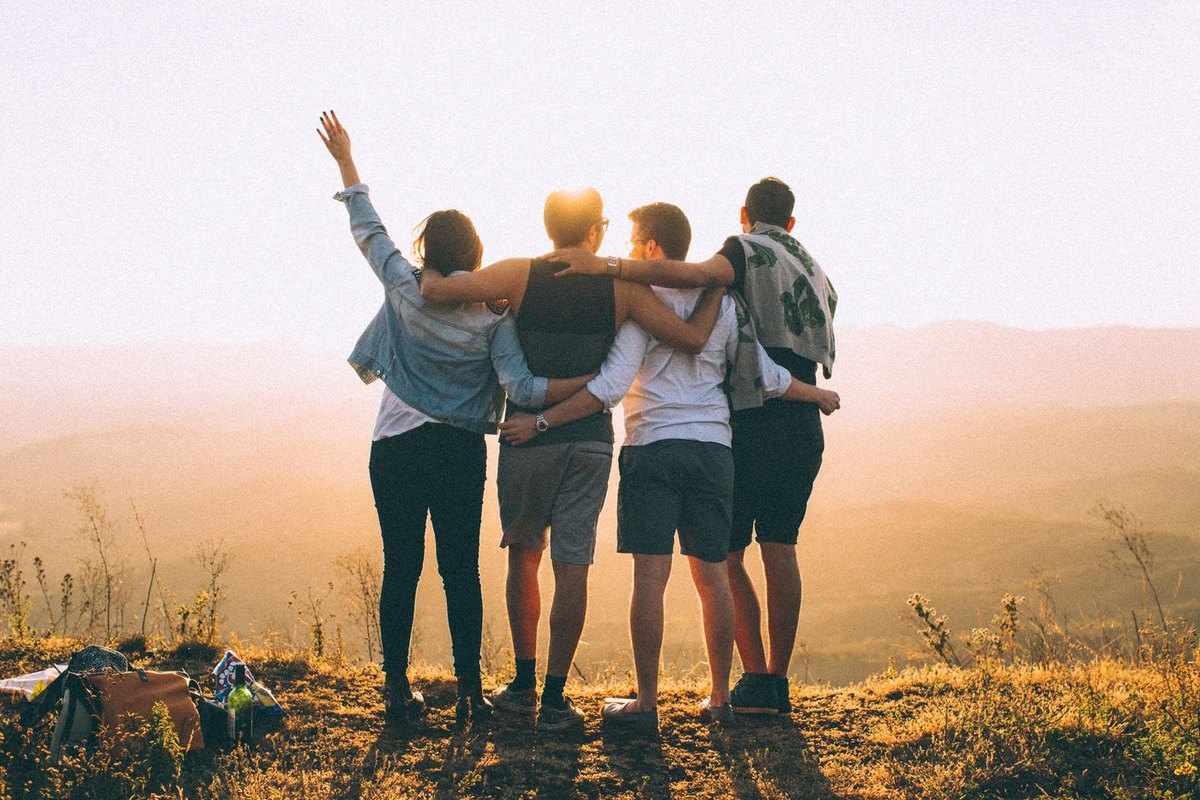
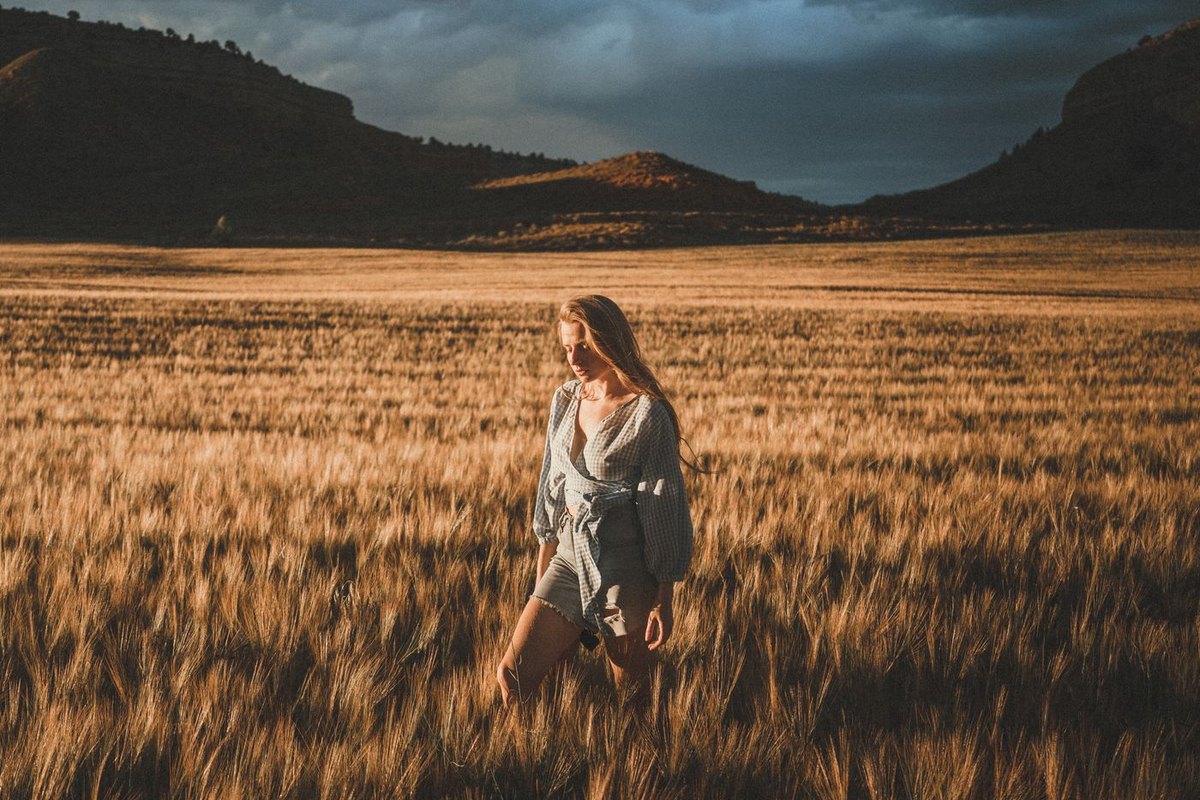
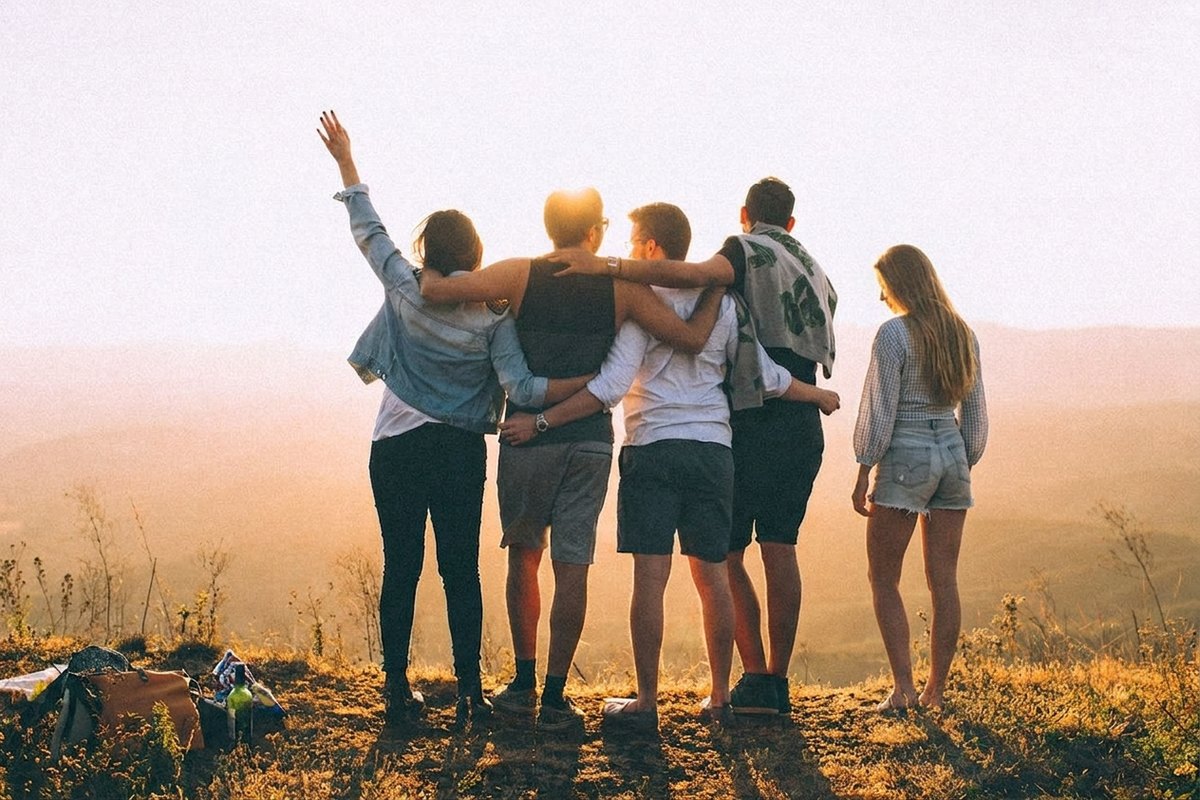
Two pictures. The group shot, which goes first because it is the base — its framing, its light and its perspective are what the result keeps — and a photograph of the person to be added, which goes second.
The second picture is where the result is decided, and it is worth spending a minute on rather than grabbing the first one to hand. What you are looking for is a photograph of them lit from roughly the same direction as the group, taken from roughly the same height, and showing about as much of them as the result needs to show.
A phone snap taken indoors under a ceiling light will not sit convincingly into an outdoor photograph taken in late afternoon sun, however good the model is. The light in a photograph is information about a place, and two places cannot be reconciled by asking nicely.
Picking the second photograph
Angle first. If the group is shot at eye level from slightly to the left, a picture of the missing person taken at eye level from slightly to the left will drop in almost unnoticed; one taken from below at arm's length will need their whole head reconstructed to make it fit, and a reconstructed head is a different face.
Then coverage. If they need to appear from the knees up, a headshot means the model invents everything below the shoulders, including the clothes. That is fine when nobody knows what they were wearing and wrong when everybody does.
Then resolution. A small, soft crop of somebody from the back of another photograph gives the model very little to work from, and it will fill the gap with something plausible. A clear, reasonably large picture of their face is worth more than a perfectly posed tiny one.
Where several candidates exist, pick the one whose light matches, not the one where they look best. Flattering is easy to lose in a redraw; matching light is what makes the picture read as a single photograph, and no instruction recovers it once it is wrong.
Saying where they go
Name the position in the frame and the anchor beside them: "add the person from the second photo to the right of the group, standing beside the man in the blue shirt". Position alone leaves the model to choose a depth; naming a neighbour fixes both.
Give a height cue. "About the same height as the woman on the left" is a single clause that prevents the most common visible failure, which is somebody who is subtly too tall or too short for the row they are standing in.
Say what they are doing if it matters — facing the camera, looking at the person beside them, an arm around a shoulder. An arm around a shoulder is a genuinely harder request, because it means altering the person already in the picture too, so expect to look closely at both of them.
And say the light: "match the warm indoor light of the first photo". It is the shortest instruction on this list and it fixes the most.
The family photograph nobody is complete in
This is the case the page exists for. One person takes the picture every year and is therefore in none of them; or somebody could not get there; or the photograph everyone loves happens to predate a member of the family.
The practical approach is to work from photographs taken on the same occasion where you can. A picture of the absent person from the same afternoon, in the same clothes, under the same sky, produces a result that is difficult to fault — and if that photograph exists, this becomes a five-minute job rather than a project.
Where it does not exist, expect to try two or three source pictures before one sits properly, and to spend a credit or two doing it. That is normal and it is what the daily allowance is for; the alternative — accepting the first result because it was the first — is how a picture ends up on a wall with something slightly wrong about it that nobody can name.
One family-specific note. A composite is a lovely thing to have and a poor thing to lose track of. Keep the original alongside it, because the version that gets shared is the version that gets remembered, and the original is the record.
Team photographs and the person who was travelling
The work version of the same job: the team shot taken on the one day somebody was away, needed for a website or a deck. Here the requirements are looser in one respect and tighter in another.
Looser, because a work headshot usually already exists, shot straight on in even light, which is close to the ideal second picture. Tighter, because the result is going to be published, and a published composite has a different standard to meet than a print on a shelf.
The convention worth following is simply not to make it a puzzle: if a photograph on a company page was assembled rather than taken, say so somewhere. It costs nothing, it is the sort of thing that is noticed eventually, and being the one who mentioned it first is a better position than being the one who did not.
What it does badly, and the one thing to check
Faces, first and always. The person you added is re-rendered rather than pasted, so compare their face at full size against the photograph you took it from. A face that has drifted is the failure this job produces most often and the one people notice last, usually after printing.
Shadows and contact points, second. Somebody standing on grass casts a shadow onto it, and a figure who does not is the detail that makes a picture read as wrong before a viewer works out why. Say "and their shadow" in the instruction, then look at the ground.
Overlap, third. Someone standing behind another person means the model has to invent the part of them that is hidden, and someone with an arm around a neighbour means altering that neighbour too. Count limbs, check outlines, and prefer a position at the edge of a group to a position in the middle of one.
The opposite job — remove a person from a photo — is a page of its own, and the two get used together more often than you would expect: take the stranger out of the background first, then put the missing person in, in that order, so the second pass is working on a cleaner frame.
Cost, limits and privacy
12 free credits are yours with no account, spent once. Signing in adds 12 fresh credits every day, and on this job in particular that is the difference between accepting the first attempt and getting the one you wanted, because two or three source pictures is normal.
The result carries no watermark on any tier, because it is an edit of photographs you uploaded. Commercial use — a company page, a client's marketing — is covered from Pro up; free results are for personal use.
Both uploads are deleted the moment processing finishes. The result sits at a temporary link that expires on its own — 1 day anonymously, 7 days with a free account — and no second copy is kept anywhere. Each file is capped at 10 MB, in JPG, PNG or WebP.
Questions people ask
What do I need to upload?
Two pictures, in this order: the photograph you want them added to, then a photograph of the person. The first upload is the base, so its framing and light are what the result keeps.
Which photo of the person works best?
One lit from the same direction as the group, taken from a similar height, and showing as much of them as the result needs. Matching light beats a flattering pose — the pose survives a redraw and the light does not.
Will they still look like themselves?
Usually, when the source picture is clear and reasonably large. The face is re-rendered rather than copied, so a small or soft source gives the model room to invent. Compare at full size before you keep it.
Can I add someone to an old family photograph?
Yes, and a source picture from the same era and the same kind of light works far better than a modern one. If the old photograph is also damaged, repair it first — a composite built on a crease inherits the crease.
Why does the added person look pasted on?
Mismatched light, a wrong scale, or a missing shadow — usually the first. Name the light you want matched, give a height cue relative to somebody already in the frame, and ask for their shadow explicitly.
Can I put someone in the middle of a group?
You can, and it is the harder request: the model has to invent the parts of the neighbours they now hide. A position at the edge of a row is markedly more reliable, and it is worth trying that first.
Is the result watermarked?
No. This is an edit of your own photographs, and edits carry no watermark on any tier, including anonymous free use.
How many attempts should I expect?
Two or three, usually with different source pictures rather than different wording. That is what the daily credit allowance is for, and it is a better plan than accepting the first result because it arrived first.
Is it honest to use a photo like this?
For a family print or a card, nobody is being misled and it is a lovely thing to have. For anything published — a company page, a press image — say that the photograph was assembled. And it is not evidence of anybody having been anywhere.
What happens to my uploads?
Both are deleted as soon as processing finishes. The result lives at a temporary link that expires by itself — 1 day anonymously, 7 days with a free account — and no second copy is kept.